Date posted: July 29, 2009
– Download Esky HoneyBee King 3 as PDF –
Ahhh, Christmas comes a little early this year, right smack dab in the middle of summer. My latest entry into advancing my collection and my flight is the Esky Honey Bee King 3. Looking at the packaging, contents, and some inital hovering and adjustments.
7.3.2011 Edit – You know, looking back on some of these older articles… This one is a heli I need to fly again, I miss it, and man…. what a friggin glorified unboxing article and not much more. Too much fluff, but I was just starting. ![]()
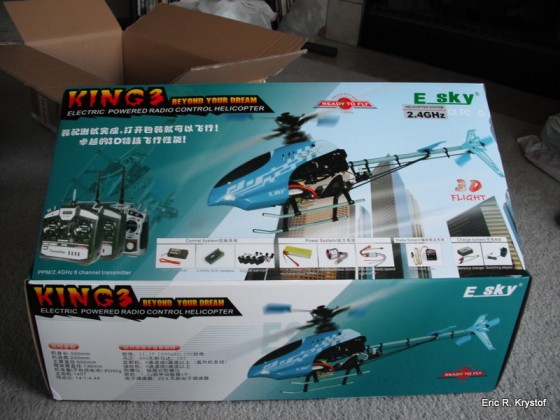
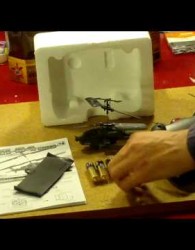
It’s a beautiful looking box:
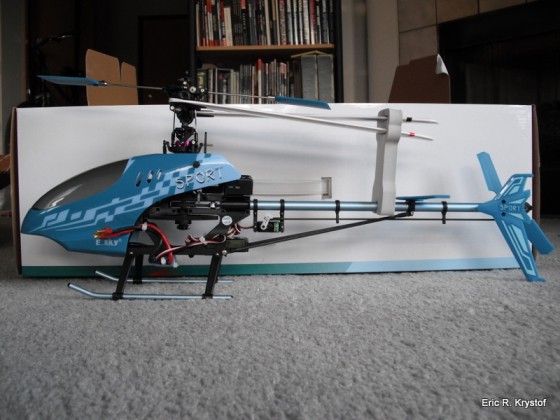
Of course, the heli isn’t too bad either:
First off, call it whatever you want… Esky, ESKY, E Sky, E-SKY, E-Sky, Eee Sk Eye (For those still hooked on phonics)… The King 3 is definitely a nice looking bird. Bigger than my Blade CPP2, but smaller than my Blade 400, it’s a nice size for me to fly indoors as well as out (with small tolerance for winds).
The HoneyBee King 3 components are upgraded versions of the King 2, and the remaining items are, generally speaking, compatible. The two things I was really looking for in getting this bird was the brushless motor and belt driven tail.
Here’s what it comes with (reference: X-Heli.com)
Product Description:
- 120 degree ECCPM control system
- Completely assembled and tested at the factory, ready to fly out box!
- New High-tech 6-channel RC system
- High performance Heading Lock gyro is Capable of sport flying and 3D aerobatics
- Digital Sub-Micro servos and Micro Heading Lock gyro offer precise and powerful control
- Stainless steel flybar, main shaft and tail shaft
- 400 brushless motor, 25A brushless ESC and 3S 11.1V 1500mAh 20C Li-Po battery deliver incredible power and performance.
- The new 2.4G remote control system adopts Advanced Spread Spectrum technology and digital FSK (Frequency Shift Key) coding technology. This combined with four digital servos, ensures rapid response, precise control and nimbler movement.
- Hold Rotation System and Auto Rotation System
- Tail Belt Drive System
- High Inertial Main Blade
- High Efficiency Tail Blade
- Rear Tail Servo Stan
Specification:
- Main blade diameter: 600mm
- Tail blade diameter: 130mm
- Length: 550mm
- Height: 200mm
- Weight: About 390g
- Motor gear: 10 teeth
- Main driven gear: 110 teeth
- Driven gear ratio: 14:1:4.44
Package included :
- 1 x ESky Honey Bee King 3 Helicopter Body, All Electronics Installed, Ready-to-Fly
- 1 × 3800KV Brushless Motor (EK5-0005) NEW!
- 1 × 25A Brushless speed controller (EK1-0350) NEW!
- 1 x ESky professional Headlock Gyro (EK2-0704B) NEW!
- 4 × 7.5g Digital Servo (EK2-0508)
- 1 x ESky 6-channels 2.4Ghz Transmitter (ET6I) NEW!
- 1 x ESky 6-channels 2.4Ghz CCPM Receiver (EK2-0424) NEW!
- 1 x ESky 1500mAh 20C Li-Po Battery (EK1-0183)
- 1 × 7.4V & 11.2V Li-Polymer Battery Charger (EK2-0851)
- 1 × 110V AC Switching Adapter
The bird I’ve flown the most is my Blade CPP2. It’s direct drive tail is an obvious upgrade from the Blade CP’s tail (where the tail motor connects to a gear which drives the tail blades). However, a belt driven tail means one less motor to have to worry about and burn through.
As the belt driven tail means that the tail speed is constant, an additional servo is required to change the pitch of the tail blades. In non belt driven tail systems, no servo is required, as the speed of the motor is used to control the rudder.
I ordered this specific bird from miracle-mart.com for around 170 dollars. Looking at the site now, it’s rocking around 155 dollars, but that’s the way it goes. After shipping, it was still beating other sites I searched through, so personally it was a great deal.
There are of course numerous versions, 72 mhz, 2.4, red, blue, yellow, etc. I chose blue because I already have enough red, and 2.4 ghz because I didn’t want to worry about crystals.
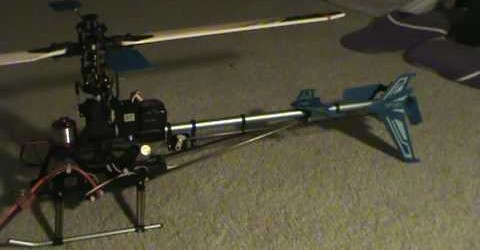
The bird itself was almost ready to rock out of the box. Pre-flight checks of servos and belt tightness (based on manual suggestions) showed that everything was in working order. Blades were balanced. The Gyro, however, was the only piece that gave me some trouble.
At first I saw the tail servo was the only servo to twitch during the pre-flight test:
I wasn’t sure what to think of it. Thanks to the always helpful helicopter gurus that hang around RC Universe, I received some helpful diagnostic advice.
By removing the Gyro from the circuit (unplug the gyro and remote gain from channels 4 and 5, unplug the tail servo from the gyro, and plug the tail servo into channel 4, then retest), I was able to show the tail servo was just fine, completely smooth movement.
So, is it the Gyro? Seems that way. Hooking it all back up and I still had a twitch. I was thinking I may need to adjust the pots on the Gyro itself, so to see where they were set compared to the minimum locations, I took a flat head screwdriver, turned both pots all the way to the left until they stopped, then back to the original position.
Now, the Gyro is back to the way it was out of the box. I hooked it back up and tried it, and lo and behold… no more twitch. All I really did was turn the pots all the way down then back to where they were. Sticky Pot, perhaps? I’ve had no twitches since then, so I’m happy, but I’ll still be keeping an eye on the Gyro and rudder servo.
This is good proof that it pays to check that servos are moving properly, blades are balanced, and all the general pre-flight checks before you just speed up and go. If I hadn’t done that and decided to burn it hard up into the air, this article would be titled ‘How to clean up bits and pieces of an Esky Honey Bee King 3’.
Initial hover tests showed that the gain on the gyro needed to be remotely tweaked on the transmitter, as I was getting some slight tail wagging. Turning the knob down a little bit solved that.
Since I was able to take the helicopter to the indoor flying area (read: indoor soccer field) today, it proved a great time to check out the bird without bags and boxes in my apartment getting in the way. Mom, if you’re watching, I swear I’ll clean.
Tweaking the gain just a little more proved to be a more stable tail, but I still need to tweak the Gyro a bit more, as I can’t trim out the tail rotation. It wants to slightly move to the left or right based on transmitter trim – meaning there isn’t a rudder trim setting on the transmitter I can use that keeps it completely straight forward. However, it is still easily flown.
So, to get that perfect hover in terms of rudder, I’ll need to tweak the Gyro some more. I expected some sort of tweaking, as many have said to me, it says ‘Ready To Fly’… but it’s never truly ‘Ready to Fly’.
Here’s the first hover and maiden flight. All in all I can feel it’s more powerful than the Blade CPP2. Once I get more comfortable with flying helicopters, I am very much looking forward to opening her up and seeing what she can do. You can tell by the video I’m still at the hover and forward-reverse flight stage in my radio controlled helicopter career.
I like this puppy so far, yes sir!






11 Comments
RICHARD F BARR
07/07/2011
E.R.
today I FOUND your site, paid attention and discored we have a lot of “commonality” in the things we use : HBK 3 , mSR, etc PLUS I want to show my admiration for this wonderful GREAT site.
I enjoyed every second.
RICK
yes: the FLU still hangs on, and on, and on
Eric Krystof
07/07/2011
Thanks, Mr. Barr, hope you’re feeling better, and so glad you’re enjoying the mSR. You’re like a kid in a candy store on the RC Universe forums, it’s great to see more people enjoying this awesome little machine!
Thank you very much for the compliments, you and the other forum gents have been great help in fine tuning the site, as well as great support, I can’t thank you all enough.
Jay
07/07/2011
Hey, A very informative page. I just got the exact same stock model for xmas. I was wondering if you could post a pic of your stock gyro settings?Whenever I flick the switch on my remote and goto “Head-hold” mode she just spins and spins. I adjust the trims on the controller but that on my makes it spin slower or faster…LOL Thanks
Eric Krystof
07/07/2011
I’ll see what I can whip up this weekend, I might have something I can post up here at least to what my Gyro is set at currently. As far as the bird itself it is not currently in a .. ahem… flight-ready status. I need to replace a feathering shaft, plus I was looking at switching the transmitter out so i can run it on my DX-7. Alas, I haven’t really touched the gyro since I last flew it, so I can at least get pictures of that up hopefully tomorrow (New Years stuff tonight!)
Jerry
07/07/2011
What is laser blade balancing?
Eric Krystof
07/07/2011
Jerry,
You can balance your blades in a few different ways. After you perform the general weight and center of gravity balancing of the blades (with a balancer, a metal rod, tips of wine glasses, whatever you like) and place them on the helicopter, you still need to make sure they track along in the same plane.
Tracking adjustments are usually done by throttling up the helicopter and using a strip of tracking tape (bright red works great) and viewing the helicopter from the side, looking at the blades along the plane in which they’re spinning. You can tell if the blades are tracking properly if the ‘plane’ the blades spin in is completely level. If they’re off, you can use that tracking tape to see which blade is higher or lower and adjust your blade grips/main rotor head accordingly.
There’s also another method compared to looking at the spinning blades horizontally. You can place a colored piece of tape similar to the above method, and instead of trying to watch the blade plane, you can shine a cheap handheld laser light at the blades from above. As you move the laser along the spinning blades, you’ll see one dot from your laser. However, if your blades don’t track and need alignment, the laser will separate into TWO dots. The reason we use colored tape for this as well is that if you shine the laser on the colored tape, the light will look slightly different, and one of the two dots will look brighter or lower. That way you can tell exactly which blade is higher or lower.
So, in the end, it’s just a different method to make sure your blades are tracking. Either look at the blade plane or shine a laser from above.
I like the laser method because otherwise I have to have really good lighting and even then I can’t easily tell which blade is higher or lower unless they’re REALLY out of alignment.
So in the video above you see the laser point on the blades during the one segment – that’s me making sure the blades are tracking. Hope that helps explain it!
Jay
07/07/2011
Eric, Thanks I got it str8. I set the limit to half-way and the Delay(Gain) to 70-80% This seems to work really well. But I too am getting the spektrum dx6i… the one that’s not messed up(burn out issues)… whats was the longest you could get it to hold hover without any input?
My reason for asking is because I don’t want my expectations to exceed the abilities of the stock gyro!! I built a stand for it ad I’ve never drifted untethered. Whats your Head Hold switch settings? The book says you should flip gyro switch down for head hold but that just spins my heli crazy. Up which is rate mode seem to act as head hold really. I found the same in a forum so I just assume the most stable is my head hold lol.
Eric Krystof
07/07/2011
Jay,
Not sure if you’re talking the actual gyro itself or not, but both of the adjustable pots are right in the middle.
As far as the transmitter itself, the dial was reset when I last put it away, but I want to say it was around 1/3 from the beginning last I flew it. Need to repair the darn feathering shaft and get that thing back up.
Was that what you were looking for? That’s about all I have in terms of stock settings given that the transmitter doesn’t really have much other than the dial.
Eric Krystof
07/07/2011
Jay, if that is bass-ackwards from the manual like you say, it wouldn’t surprise me. Sometimes those things are just plain wrong.
I unfortunately can’t spin up my helicopter at the moment to tell you which is which, and I’m very sorry about that. I’ve rewired it away from the stock transmitter, so if I can get a chance and rewire the stock tx in, I may be able to power it up and see where I’m at.
-Eric
Adam
07/07/2011
Hi all,
Quick one for you. Just took my new king3 from its box & went through the setup etc.
When I did quick test this is what happened…. (after full battery charge)
I connected the battery, the gyro quick flashed & then beeped a few times.
All the head servos work fine, the rotors spool up but there is no motion at all from the
rear tail servo. Then I disconnected battery… If I try to move the servo arm (lightly by hand) it is locked solid. Should this be the case? I disconnected the servo from the arm & the arm to rotor moves smoothly so the servo is locked.
Any ideas greatly appreciated!!!
Adam (Ireland)
Eric Krystof
07/07/2011
Adam,
I’d expect the rear tail servo to be locked when the battery is on, but not so much when the battery is disconnected. Have you tried taking the gyro out of the picture by connecting the rudder servo right into the receiver, removing the gyro from the circuit all together? Don’t fly it that way, just do that to test that the rudder servo isn’t toasting out for some reason.
I’d say do something along those lines to makes sure that servo is in itself okay before you take a look at whether the gyro itself is an issue. This way you’re not diagnosing both a servo and a gyro at the same time.
If the servo works, put the gyro back in the circuit and see how it goes.
No trackbacks yet.