Date posted: June 24, 2010
– Download H-Frame and Combat Hits as PDF –
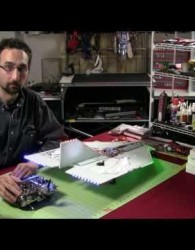
Here we have a very scruffy me introducing some footage of our latest Combat! adventure. We finally hit each other, too!… Correction, Chameleon hit me… twice.
Our trucker friend Chameleon came into town and although very cold and windy that day, we tried some combat flying, the student and the master… or the cat and the mouse, whichever you prefer.
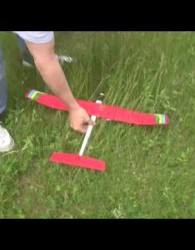
At the end of the video, Chameleon introduces ‘Cool Hand Luke’, a combat variant that is meant for a more gentle gliding than true combat, an active rudder and curved wing allows it to float up into the air with ease.


15 Comments
Pantseatflyer
07/07/2011
Nice Combat Footage! I’m currently building a Swift II and being a total noob, I wanted something to test my elevon skill with. I finished building Chameleon’s foam combat flyer from your Part I series and am very pleased with the results. I am using Dow Protection Board III. Everything is epoxied and am building the firewall tonight. Hope to have it up in the air this weekend to test out my Hobby King 6 channel transmitter/receiver as well.
Saving the Spektrum Dx7 and AR6000 for the Swift.
Keep up the good work!
Eric Krystof
07/07/2011
Pantseatflyer (excellent name!),
Great, I hope it goes well for you! The H-Frame is a bit different from the original plans, and we’re still working on tweaking how the whole fuselage actually works. I’ve since built another H-Frame but thinner, only enough width on top for the esc/rx and only enough on bottom for the battery.
I’m still looking at some ways to streamline it a bit, remove some of the ‘boxiness’.
I’ve since tried a thicker wood firewall and have stopped the epoxy-hole drilling to see if that helps in weight, and it does! But, if you go that route you may need to move the battery a little farther up to maintain a good center of gravity, which is easily adjusted after you get it up there and flying, you’ll tell if it’s tail heavy or not.
The H-Frame is lighter, but that can sometimes be a bad thing, depends on wind for penetration, and 2S vs 3S lipos.
Let me know how it goes, and if you have any questions, feel free to ask!
Pantseatflyer
07/07/2011
Thanks! It gets fairly windy here in NW Arkansas, so I will probably err on the side of caution and go for a heavier build with the epoxy-hole drilling.
I created a blog and will try to upload some progress pics.
Love the site. I came about it by accident as I was Googling just what the heck does Expo and Dual rates mean and why they are important and came across your ‘whiteboard’ explanation. It should be required viewing for beginning pilots.
Eric Krystof
07/07/2011
Thank you very much, Pantseatflyer. I’m very glad it helped out!
Please let me know about the blog once you’ve got it setup!
What motor did you end up using? My later fliers had a lower kV rating, so they really shine with 3S 11.1 volt batteries compared to the 2S. (1500 kV vs the 2600/2400 I had the first time around) Experimentation!
Thanks again!
Pantseatflyer
07/07/2011
Will do.
The brushless combo I am using is a 2216-06 brushless rated at 2200kv. Using this motor in combination with a 30-amp ESC, I should expect 24 oz of thrust at 23 amps on a 6×4 prop. Granted, that is using a 3-cell lipo. I will test with a 2 cell to set up properly.
Would you suggest an initial setup of dual rates at 50% to start or should give it a go at 100%?
Thanks!
Eric Krystof
07/07/2011
That motor should work out nicely! Since you have a good amount of wind, and if you didn’t put an active rudder, I liked high dual rates to really fight the wind as best as possible.
So I often start out around 70% on low, and 100 % on high, but as your mileage may vary, let me know what you end up choosing!
Pantseatflyer
07/07/2011
Combat flyer 90% built. A couple of things I did learn that I would change if I built another. Use a template to cut out the motor/esc compartment prior to lamenating foam as per your instructions. I had no trouble removing the lamenated sheets, but I found that the upon doing this, the perimeter of the compartment was weakened and I attempted to re-glue with Welder contact adhesive. BIG MISTAKE! This particular adhesive must have had a solvent that eats Dow Foam. What a mess. . I did salvage by filling in the scarred areas with clear gorilla glue.
I mounted the motor last night and did a trial motor/servo test. I still need to mount the ESC and battery and stationary rudder. She is a tad on the nose heavy side with a 2S lipo even with it slid aft as far as it will go. Hopefully, the rudder and said epoxy will make up some weight to balance on the CG.
Eric Krystof
07/07/2011
Good call on the template, Pants, I started doing that as well, I’ll have to update the article and make sure it’s highlighted – cutting after the epoxy is a bit nuts compared to a template. Also, that leads to our H-Frame design, which has no ‘build-up’ issue – but may not be as strong.
Sorry about the Welders – that stuff is safe for EPP foam, but Depron, PosterBoard, and Dow PB3 – it eats.
Let me know how the balancing goes!
Pantseatflyer
07/07/2011
Taped it up last night. Motor was reversed. Had to reverse the black and red wires. I opted for a prop saver.
I’m having some issues mounting the battery. Since I have so much weight in the nose, I’m having to move the battery back farther than expected. I wanted to go the velcro loop route with slots cut into the fuselage, but the battery is resting under the leading edge of the rudder.
I got some industrial strength velcro, but the adhesive does not stick well to Depron. I will end up epoxying the velcro, but I still do not feel comfortable with the battery just stuck there.
I almost feel like a need to build a housing of some sort to encase the battery in addition to the velcro so that it stays on in flight.
Your thoughts?
Eric Krystof
07/07/2011
Wow, you must have one heck of a heavy nose on this one. The velcro looping worked best for us, or extending the lower fuselage over the top of the battery, either one works. (And regardless of which, I still have a velcro strip attached to the bottom of the fuselage for the battery)
In your case though, with being so far back, you may not be able to extend the bottom fuse back far enough.
What about small slits in the rudder near the base to form the velcro loop, or is that not going to work? (Hard to tell since I’m not there seeing it)
You’re on the right track with the epoxy, the thinnest of coatings over the foam will allow the adhesive to stick better, or a layer of packing tape instead of epoxy (which is the ‘middle of the road’ solution – since the packing tape will at some point rip off)
If you feel you can get around this, you could add some more weight to the craft and keep the battery where it typically is, modelling putty or clay or quarters taped up, etc. in the tail as far back as you can could help balancing… But that is a trade off, unfortunately. Once again, not being right there is a disadvantage for me.
Hopefully those thoughts help you some, let me know.
Pantseatflyer
07/07/2011
Maidened the Combat Flyer this evening. Took off with a mild throw. It started turning to the left. I panicked and ended up giving it too much throttle and plowed it smack into the ground from about 20 feet up. Prop shattered and side of nose slightly smooshed. Thank goodness for prop savers or should I say motor shaft savers!
Not easily flustered, I took the plane inside, placed a new prop on and placed some packing tape on the smooshed front end for reinforcement.
Headed back outside for another go. Nice steady toss at 1/2 throttle and I let her climb. Got up around 100 feet and just hung there in the wind suspended! It was AWESOME!. I throttled back and floated around a couple loops and brought it in for a landing, easing the nose up a bit just before touchdown.
I flew it three more times with perfect landings the rest of the evening before the lipo was getting a little weak. What a cool plane!
Eric Krystof
07/07/2011
Pantseatflyer, glad to hear it worked out for you! Did you get it trimmed out well, I take it?
Ah yes, the smack in the ground plowing… We’ve done that numerous times, just the other day, actually… Let’s just say I need more inverted flight practice.
Pantseatflyer
07/07/2011
It was trimmed pretty well although it did tend to go to the left a bit, but I adjusted it during the next flight.
I put some dark blue Zagi tape on the bottom of the fuse (stripes) and some reflective sparkle tape on the top of the elevons. I had trouble at twilight with orientation. The only thing I had painted was the vertical rudder and that was fluorescent orange. The profile is so thin, I had a hard time tracking it because the profile well…just isn’t there. All it looked like was an orange triangle floating around.
I did take some pics and will post in a bit.
Antmeeks
07/07/2011
Love the site! It’s been a fantastic means of procrastination for me at work, lol… Thanks for all the great info & tutorials…
I’m getting my local RC club excited about the idea of having regular combat meets with your Mach I and was wondering if you’ve published plans for the modified H-frame version and/or ‘Cool Hand Luke’…
Thanks again!
Eric Krystof
07/07/2011
Antmeeks,
No, no real plans for the H-Frame or Cool Hand Luke. More ideas and what not to float around, see what others may come up with.
This weekend I’m going to try and redo the combat series a bit and consolidate the videos I’ve done beforehand into one. We’ll see how that works for at least Mach One. Afterwards, I may revisit the H-Frame. It made the craft much lighter, but it did cost a slight bit in structural integrity.
Chameleon, our trucker friend, designed Cool Hand Luke and I may revisit it in the future. It’s a good floater frame since it’s airfoiled, but probably doesn’t fit into combat too much given our focus on it is cheap, fast to build, and meant to be destroyed!
Thanks for visiting!
No trackbacks yet.